An archive can be imported by clicking on Import in the action bar of the Manage Archives mask. A popup appears: Select the ZIP file containing a previously exported archive definition that is to be imported and click on the Import button.
Please note: JobData connections are not imported. These must be created and linked manually. The same applies to User Assignments to Archive Profiles.
The ZIP file will be transferred to the server.
After a successful transfer the following form appears:
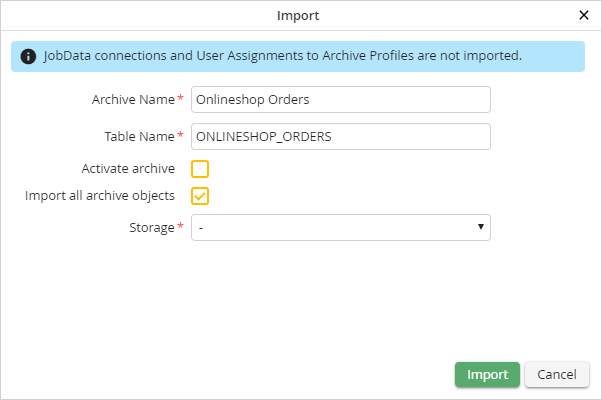
If desired, you can change the archive and table name here. This is necessary especially if an archive with the same archive name or table name already exists. Furthermore, you can directly activate the archive while importing it. To do so, select the respective checkbox. If the checkbox Import all archive objects is activated, not only the archive and its Index Fields are imported, but also all linked objects contained in the export (e.g. Archive Profiles, Archive Views, Result Lists, etc.). Finally, you have to choose which storage is to be used by the archive. Clicking the Import button starts the import of the archive definition.
After the import is completed successfully, a confirmation window is displayed.